Robust Java Frameworks for Your Web App Development Projects!

Released on 23rd Jan 1996, Java is 24 years old now. Despite being in the market for more than two decades, it is extremely relevant even today and universally accepted programming language. Many technology giants like Amazon, Netflix, eBay, IBM, Dell, Oracle, etc. are widely using these frameworks. It has constantly ranked in the first position as per the TIOBE index.
It is possible to architect highly secure customer-centric apps using
Java application development. Java is a robust and dynamic language and when combined with its frameworks, provides excellent solutions for diverse industrial domains like healthcare, eCommerce, transportation, finance, education, banking, etc.
In this blog, you will get a glimpse of the top Java frameworks used by Java developers along with their pros and cons. But, before we dive deeper into it, let’s quickly run through what Java frameworks are and why they are used?
What are Java frameworks and why they are used?
A Java framework is a body of pre-written code to enable easier, faster, and efficient development as well as the deployment of the web apps. It is a kind of template which the developers can use for Java web app development by adding their own code and re-using the components in it.
A Java framework alleviates the need to write the code from scratch. It gives a structure to the web apps by automating a lot of things for consistent and accurate results. These may even include predefined functions and classes for interacting with software systems or managing the hardware devices, depending upon the type of framework. One can use the framework by calling the inheritance, functions, providing callbacks, listeners, etc.
Promising Java Frameworks to Know in 2020!
There are multiple frameworks available in the market for Java web app development and they all serve different purposes and good for specific requirements. Here are the most commonly used Java frameworks that you must know.
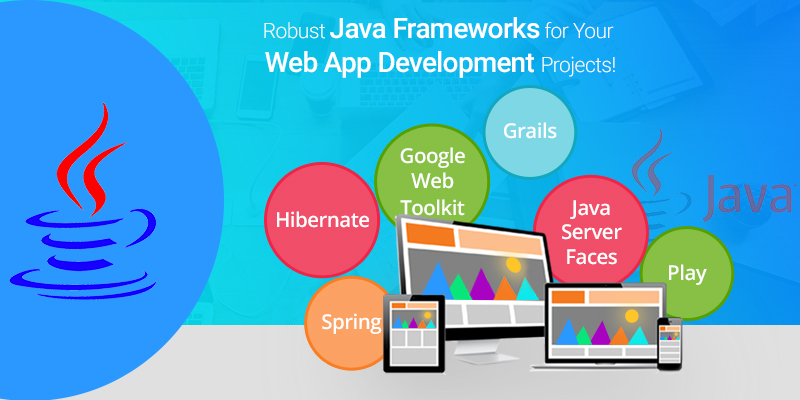
Spring
Spring is an open-source Java framework that is lightweight, powerful, and known for building complex and high-performing web apps. It is a feature-rich modular framework that has several add-ons like REST APIs, SOAP services, secured authentication, etc. The aspect-oriented programming features and the concept of dependency injection in Spring allow the Java developers to develop enterprise-level applications. It is a framework having several modules like Spring Core, Spring Security, Spring ORM, Spring MVC, Spring Boost, Spring Transaction, etc.
Pros
- Supports JDBC thereby reducing the errors and enhancing the productivity
- Better modularity for enhanced code readability
- The framework is lightweight, hence can be triggered without an application server
- Simplified injection to test data through POJOs
- Supports Inversion of Control (IOC) to satisfy the application dependencies itself
- Provides backward compatibility and testability of the code
Cons
- Learning Spring could be time-consuming and difficult
- A newbie may find it difficult to implement MVC
- It keeps changing over time
Hibernate
Hibernate isn’t a full-stack framework but is one of the best frameworks when it comes to the database. It is an Object-Relational Mapping (ORM) framework used for building highly stable apps. ORM is useful in connecting data across incompatible systems and helps the data to flow seamlessly; thus making it easier to work in a complex ecosystem. It also helps to overcome issues like Paradigm Mismatch or Object-Relational Impedance Mismatch. Hibernate also facilitates sound communication between Relational Database Management Systems (RDBMS) and Java programming language. A Java application development company can rely on this framework for developing scalable web apps.
Pros
- Free, open-source and powerful
- Productivity, portability, scalability, and maintainability
- With small modifications in code, communicating with any database is possible
- Repetitive code is removed from the JDBC API
Cons
- Restarting could be immensely slow at times
- In the case of power-cut, all the data may be lost
Google Web Toolkit (GWT)
This is a free, open-source, and developer-friendly framework, that helps to build complex applications at a fast pace without the proficiency in front-end technologies. It is used for creating and debugging Ajax apps in Java. It allows conversion of Java code into JavaScript code which saves time and effort to a great extent. It provides great features such as bookmarking, internationalization, cross-browser compatibility, management of history, etc. GWT is one of the best frameworks for responsive and performant web apps with a lower load on server-side and heavy lifting on the client-side.
Pros
- Easy to learn
- Google APIs can be used in apps built using GWT.
- Reusability of code
Cons
- Though it is evolving at a fast pace, all functions and interfaces may not be available.
- Its compilation is slower and may require a proprietary method for defining structures.
Java Server Faces (JSF)
Developed by Oracle, JSF helps to build user interfaces for applications developed in Java. It is a framework based on the design pattern of MVC used for building native apps and enterprise apps. It is a stable framework. In this framework, User Interfaces can be created simply by drag and drop of the UI components. It has an architecture that differentiates between app logic and representation in an explicit manner. JSF may not be a very efficient framework but is easy to use due to the support of Oracle’s methodical documentation.
Pros
- Offers outstanding tools and rich libraries
- It has reusable UI components
- This framework is an intrinsic part of Java EE
- Developers using IDE software find this framework convenient to use.
Cons
- Without prior experience in Java web app development, learning JSF would be quite hectic.
Grails
Grails is a full-stack dynamic framework. It uses Spring MVC as the base web application framework to develop applications based on the MVC design pattern. It is written in the programming language called Groovy and is much compatible with the syntax in Java. It works seamlessly with (JVM) and offers robust features like compile-time meta-programming, asynchronous programming, etc. Grails works with technologies like Java EE containers, SiteMesh, Spring, Hibernate, Quartz, etc.
Pros
- The setup process is much easier
- Object mapping is easy
- Provides a rapid development cycle
- Has a variety of plug-ins for making the programming easier
- Managing CSS is easy
- Supports configuration which is dynamic
- It has well-structured and easy documentation.
Cons
- Working on multi-threaded apps could be tedious at times
- Developers need to work with runtime language
Play
Mobile and Web Applications can be built using Scala and Java with the base as Play framework. It has an architecture that is lightweight and web-friendly. This framework is built on Akka and uses the asynchronous model designed on top of the Akka toolkit. As it is developed over Akka, it minimizes resource consumption like CPU, memory, etc. which facilitates in developing scalable applications.
Pros
- Asynchronous processing ensures high performance
- It provides features like ‘hot reload’ and convention over configuration
- It is a highly flexible framework known for failure-tolerant results
- Typesafe and Zenexity provide commercial support to this framework
- Improves productivity of the developer
Cons
- Since it is developed over I/O async, Java developers will need to handle inner classes which would be difficult to identify
- There isn’t much difference between Play1 and Play2
- It may or may not follow J2EE web standards
Are You Interested in Building a Top-Class Website or Mobile App?
End Note:
Every project has a specific requirement and so, choosing the right framework could be challenging. The frameworks mentioned above are the most widely used by almost every Java
web app development company. All of them are designed to suit different project needs. By studying their significance, pros, and cons you can decide the best one for your project.
I hope this blog helps you to find the best-suited Java framework for your business requirements.
Let us know your comments on this.
For any other queries, drop us a mail at sales.enquiry@biz4solutions.com